ClickUp is a powerful project management tool that offers various features to help you stay organized and enhance collaboration. One of the key features in ClickUp is the ability to assign tags to tasks, allowing you to categorize and filter your tasks efficiently. In this article, we will guide you through the process of setting up tags on ClickUp, enabling you to streamline your workflow and manage your projects effectively.
Step by Step Guide on Setting Up Tags on ClickUp
Step 1: Access the Task Creation Window
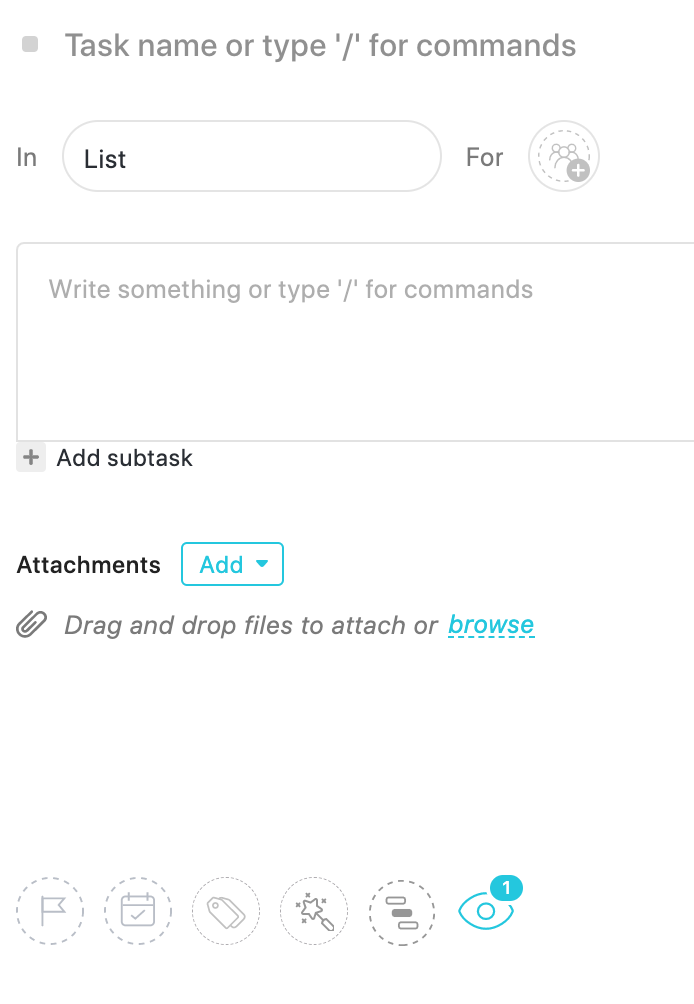
To begin setting up tags on ClickUp, start by creating a new task. Locate the “+ Task” button, usually displayed prominently in blue, and click on it. This will open the task creation window, where you can provide details about the task.
Step 2: Add Tags to the Task
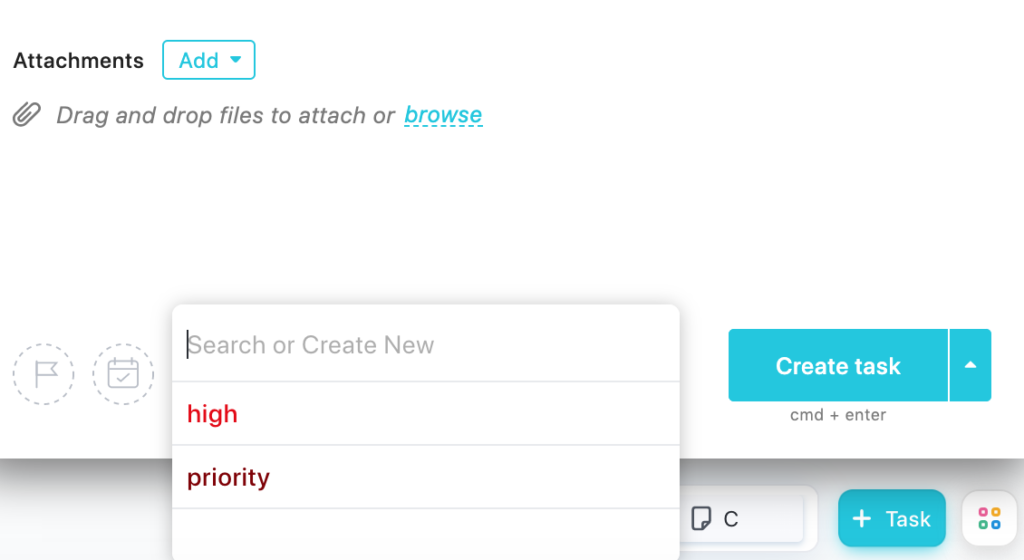
Within the task creation window, you will find a tag icon at the bottom. Click on the tag icon, and a new window will appear at the top of the task creation window, labeled “Search or create new.”
Step 3: Create a New Tag
To create a new tag, simply type in the desired tag name in the search bar within the tag window. As you type, ClickUp will display suggestions if a similar tag already exists. If you want to create a unique tag, continue typing, and once you’ve entered the desired tag name, press “Enter” on your keyboard.
Step 4: Create Multiple Tags
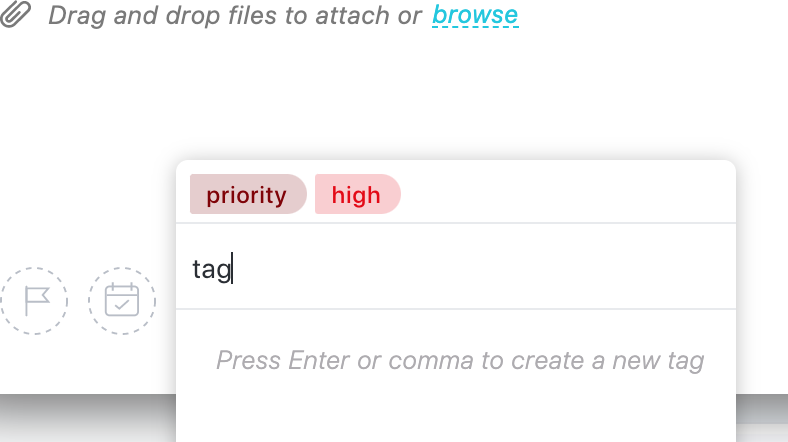
If you wish to create multiple tags simultaneously, you can separate them using commas. For example, typing “Tag1, Tag2, Tag3” will create three separate tags. ClickUp will create individual tag icons around each tag name.
Step 5: Associate Tags with the Task
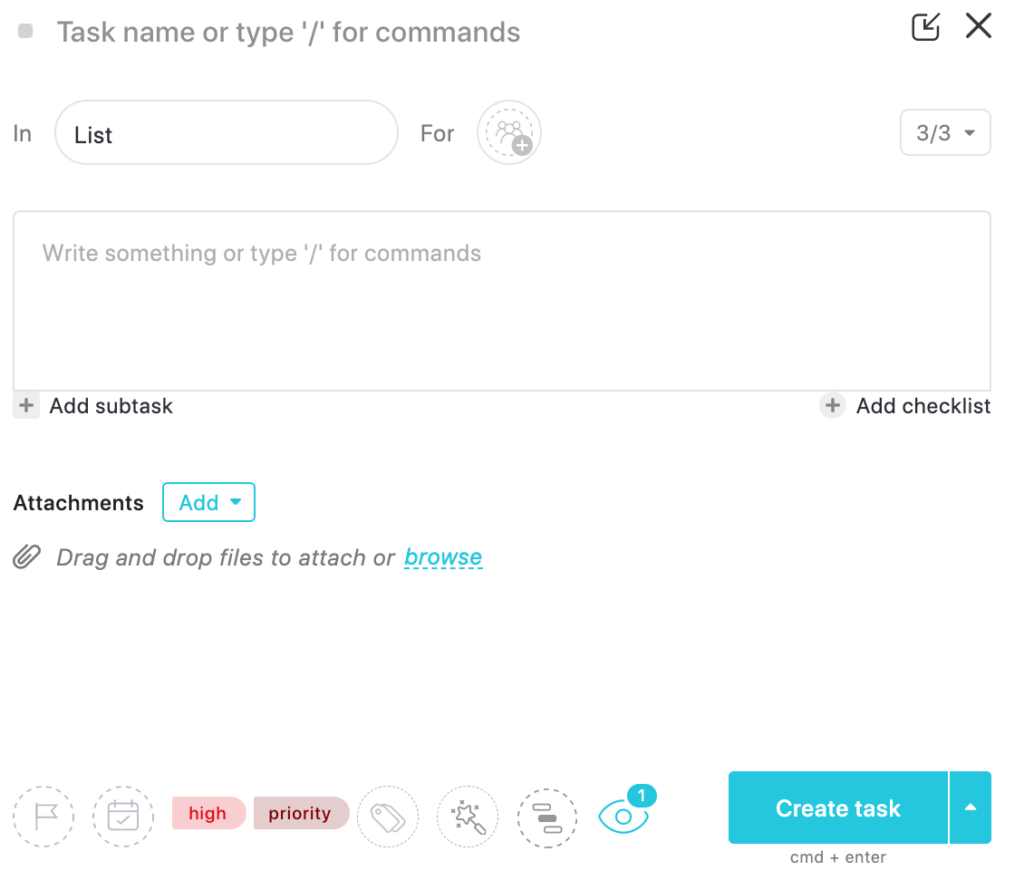
ClickUp allows you to associate tags with the task you are creating. To assign a tag to the task, simply click on the desired tag icon. This action will link the tag to the task.
Step 6: Customize Tag Properties
After associating a tag with the task, ClickUp offers additional options to customize the tag. By clicking on the tag icon, you will see options to delete the tag, rename it, or change its color. You can choose the relevant option based on your requirements.
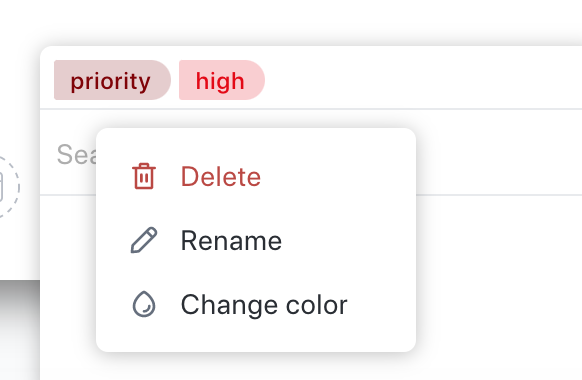
Step 7: Set Tags and Complete Task Creation
If you have completed the desired customization for the tag, you can click anywhere in the white area of the task creation window to finalize the tag setup for the task. This action will set the tag within the task.
Step 8: Add Additional Tags (Optional)
If you wish to assign multiple tags to the task, click on the tag icon again, and follow the same steps as mentioned above to add a new tag name. Once you’ve added the new tag, click in the white area of the task window to save it.
Step 9: Finalize Task Creation
After setting up the tags and filling out all the necessary details for the task, click the “Create Task” button to finalize the task creation process. The task will be created with the assigned tags, making it easier for you to categorize and manage your tasks within ClickUp.
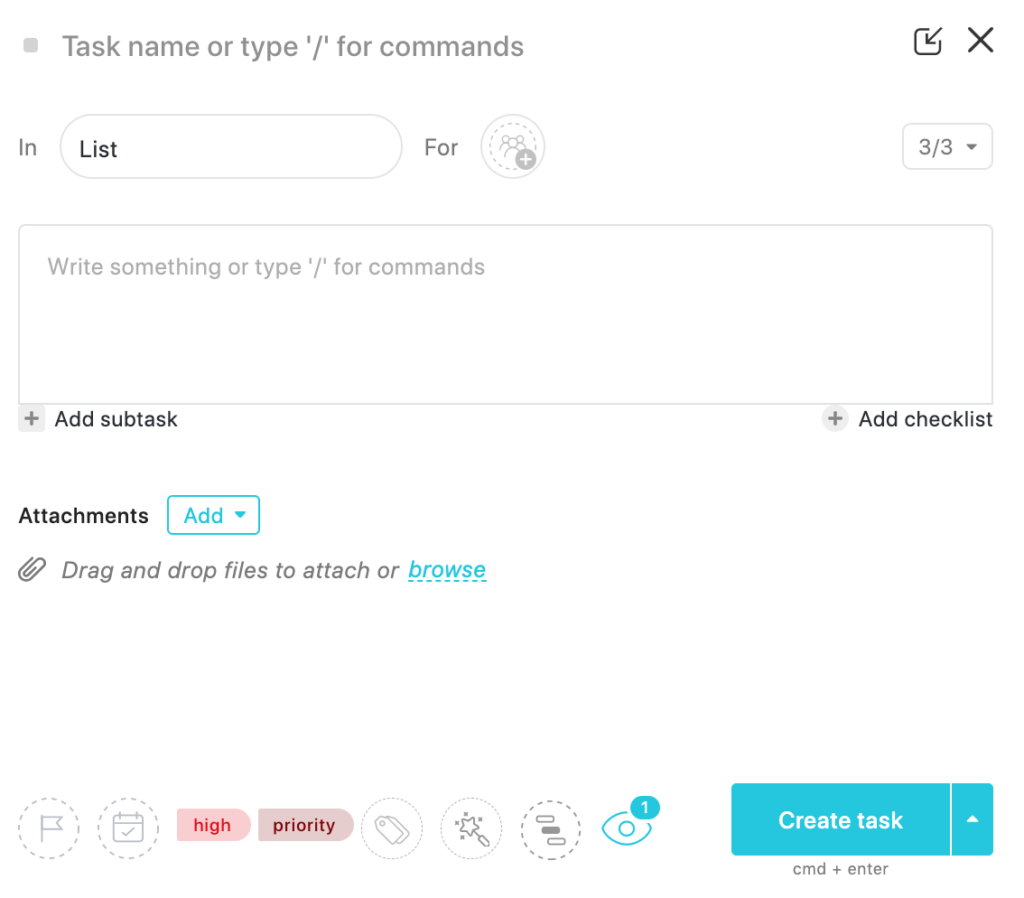
Tags in ClickUp provide a powerful tool for organizing and categorizing tasks, allowing you to streamline your workflow and improve productivity. By following the steps outlined in this article, you can easily set up tags on ClickUp and optimize your project management process. Leverage the flexibility of tags to create meaningful categories and enhance collaboration within your team.
Related
The Power of Dashboards: How to Set Up a Dashboard on ClickUp
Why Do You Need Spaces on Clickup
Clickup Task vs. Folder vs. List
Pingback: Does Clickup Work Offline? - Digital Marketing CEO
Pingback: How to Sync Google Calendar with ClickUp - Digital Marketing CEO
Pingback: ClickUp 3.0: Redefining Productivity with an Array of Exciting Updates - Digital Marketing CEO
Comments are closed.