Looking to delete your ClickUp account? Look no further! In this ultimate guide, we’re going to walk you through the process step by step, so you can bid farewell to ClickUp with ease. Deleting your ClickUp account may seem like a daunting task, but we’ve got you covered. Whether you no longer find it useful or you’ve simply switched to a different project management tool, we’ll show you how to delete your account in just 5 simple steps.
In this guide, we’ll outline the exact steps you need to take to ensure a smooth account deletion process. From navigating the ClickUp settings to permanently deleting your data, we’ll provide you with all the information you need to make a clean break. Our easy-to-follow instructions and detailed screenshots will make this process a breeze, even for those who are not particularly tech-savvy. So, let’s get started and say goodbye to ClickUp once and for all!
Reasons for Deleting a ClickUp Account
Before we dive into the step-by-step process of deleting your ClickUp account, let’s quickly go over a few reasons why you might want to delete your account in the first place. Perhaps you’ve found a project management tool that better suits your needs, or maybe you simply no longer require the features ClickUp offers. Whatever the reason, it’s important to understand why you’re deleting your account to ensure you’re making the right decision.
Deleting your ClickUp account will permanently remove all your data, including tasks, comments, and attachments. If you have any important information stored in ClickUp, make sure to back it up before proceeding with the deletion process. Additionally, keep in mind that once your account is deleted, you won’t be able to recover any of your data, so be absolutely certain before taking this step.
When you’ve made up your mind and are ready to delete your ClickUp account, follow the steps outlined below.
Follow These Steps to Delete ClickUp Account
Step 1: Backing up your ClickUp data
Before deleting your ClickUp account, it’s crucial to backup any data you want to keep. ClickUp provides an easy way to export your data, ensuring you don’t lose any important information. To do this, follow these steps:
1. Log in to your ClickUp account.
2. Navigate to the workspace you want to backup.
3. Click on your profile picture in the right corner of the screen.
4. Select “Settings” from the dropdown menu.
5. In the “Settings” menu, click on the “Export Data” tab.
6. Choose the data you want to export, such as tasks, comments, or attachments.
7. Click on the “Export” button to start the export process.
8. Wait for the export to complete and download the exported data to your device.
Once you’ve successfully backed up your ClickUp data, you can proceed to the next step.
Step 2: Cancelling your ClickUp subscription
If you have an active subscription with ClickUp, it’s important to cancel it before deleting your account to avoid any unnecessary charges. Whether you’re on a free trial or a paid plan, follow the steps below to cancel your ClickUp subscription:
1. Log in to your ClickUp account.
2. Navigate to the workspace where you have your subscription.
3. Click on your profile picture in the bottom left corner of the screen.
4. Select “Settings” from the dropdown menu.
5. In the “Settings” menu, click on the “Billing” tab.
6. Find your subscription details and click on the “Cancel Subscription” button.
7. Follow the prompts to confirm the cancellation.
Once you’ve successfully cancelled your ClickUp subscription, you can move on to the next step.
Step 3: Deleting your ClickUp workspace(s)
Now that your data is safely backed up and your subscription is cancelled, it’s time to delete your ClickUp workspace(s). ClickUp allows you to create multiple workspaces for different projects or teams, so make sure to delete all the relevant workspaces before proceeding. To delete a workspace, follow these steps:
1. Log in to your ClickUp account.
2. Navigate to the workspace you want to delete.
3. Click on your profile picture in the bottom left corner of the screen.
4. Select “Settings” from the dropdown menu.
5. In the “Settings” menu, click on the “Spaces” tab.
6. Find the workspace you want to delete and click on the three-dot menu next to it.
7. Select “Delete” from the dropdown menu.
8. Follow the prompts to confirm the deletion.
Repeat these steps for each workspace you want to delete.
Step 4: Removing Integrations
Before deleting your ClickUp account, it’s important to remove any integrations. This ensures that no external services or users have access to your ClickUp data. To remove integrations, follow these steps:
1. Log in to your ClickUp account.
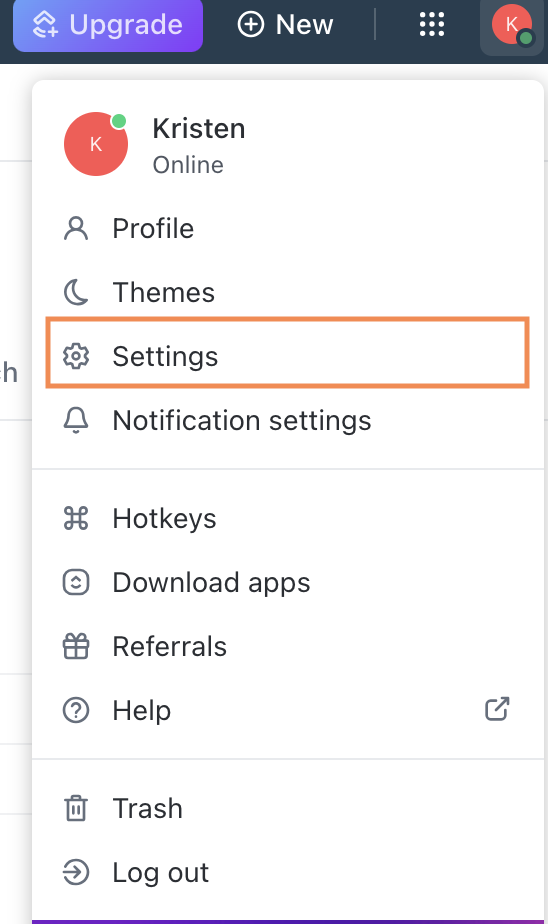
2. Click on your profile picture in the top right hand corner.
3. Click on the “Settings” tab.
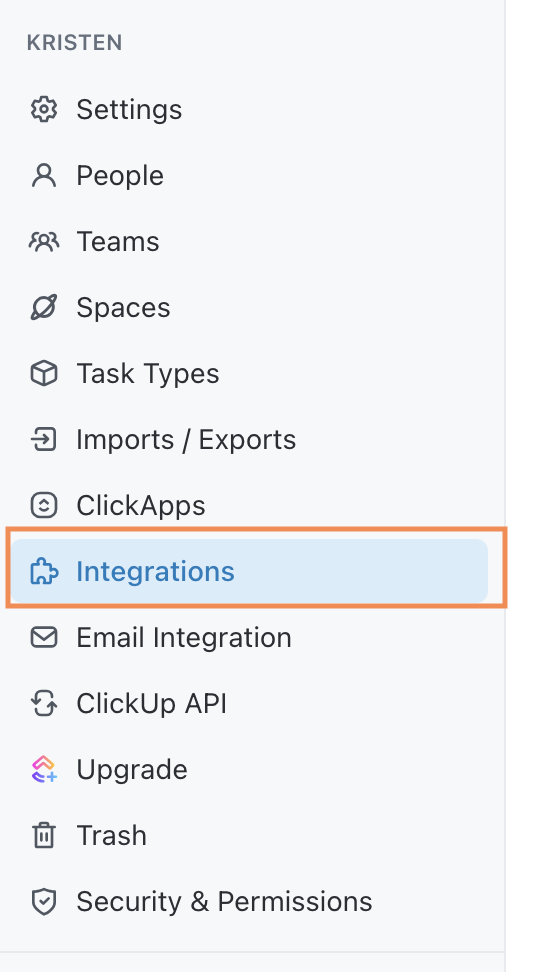
4. Click on “Integrations” on the left hand side.
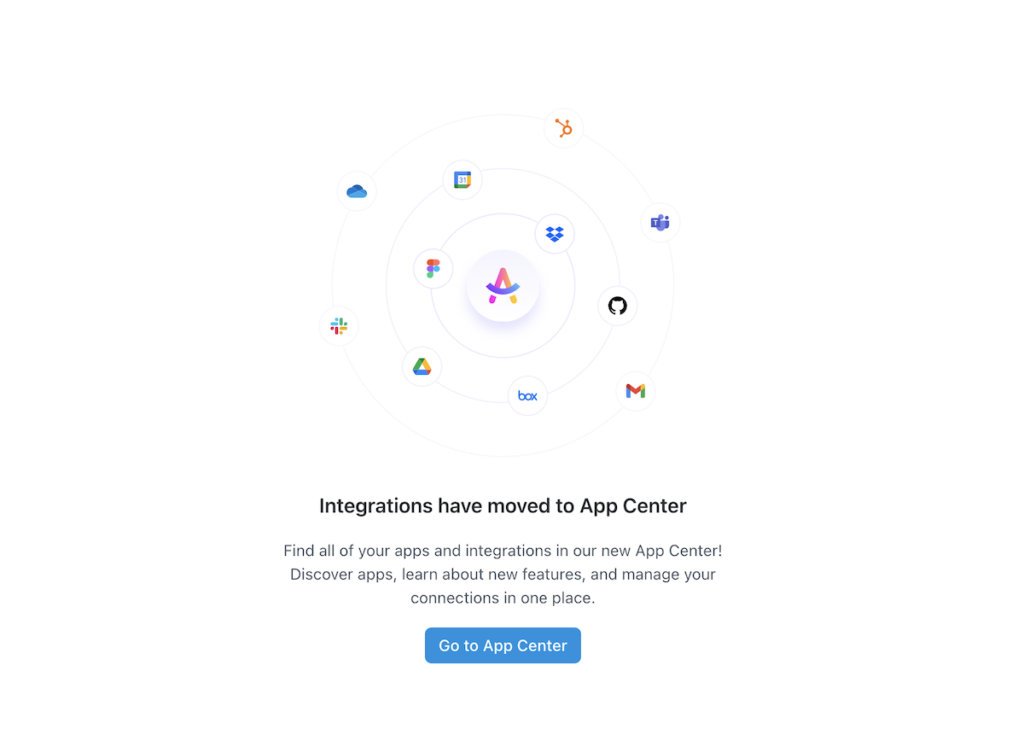
5. Click “Go to the App Center.”
6. Navigate to the app that you have connected from this list below.
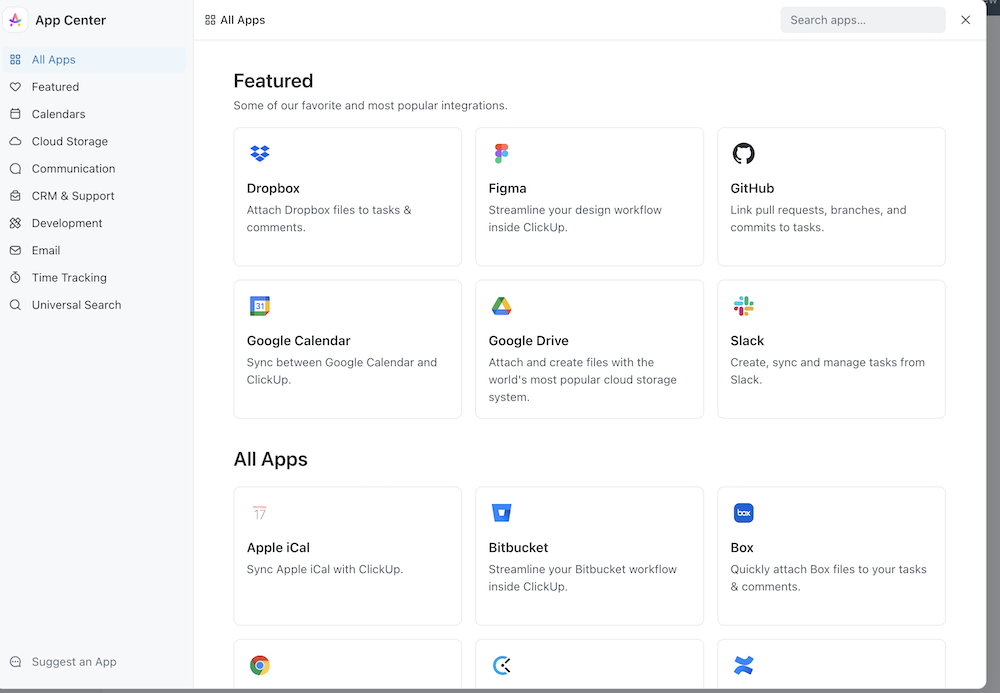
7. Remove any integrations you no longer need by clicking on the “Disconnect” button.
Once you’ve removed all integrations, you’re ready for the final step.
Step 5: Deleting your ClickUp Account
Now that you’ve completed all the necessary preparations, it’s time to delete your ClickUp account. To delete your account, follow these steps:
1. Log in to your ClickUp account.
2. Click on your profile picture in the top right corner of your screen.
3. Click on the “Settings” tab.

4. Scroll and down and click on the “Delete Account” button.
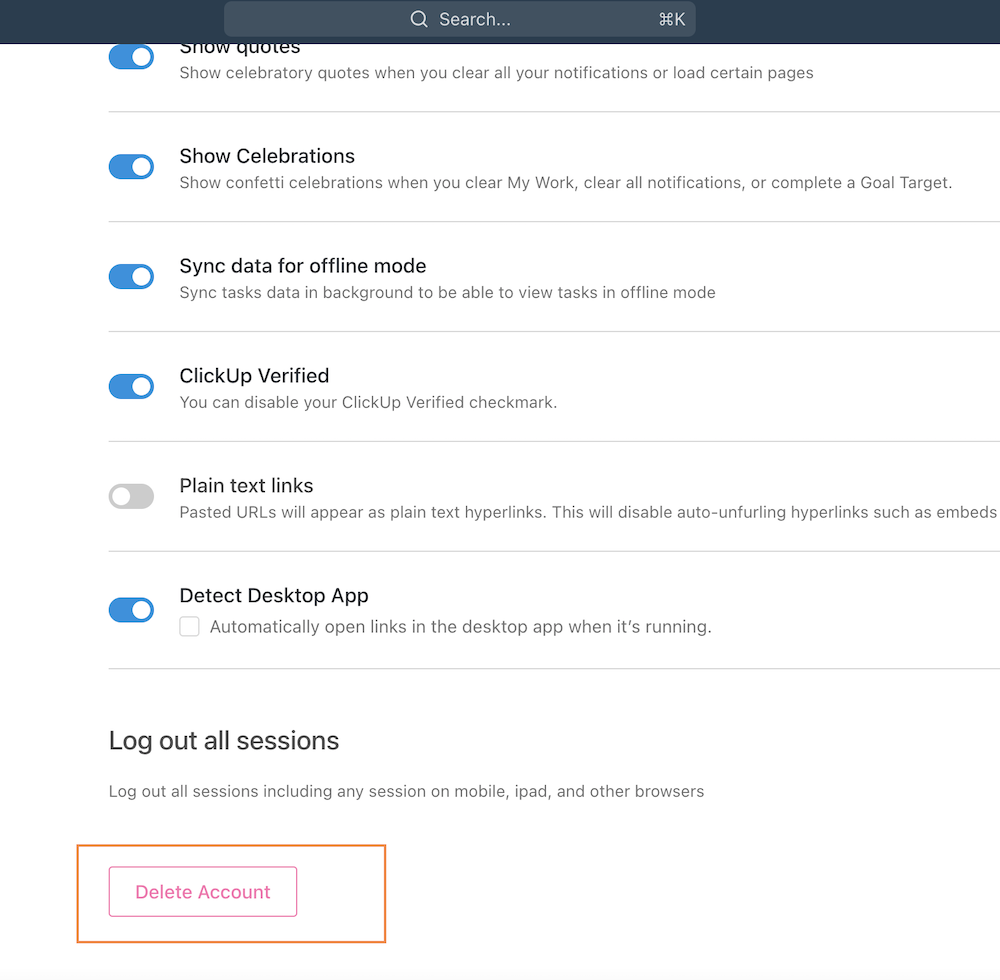
5. Follow the prompts to confirm the deletion.
6. Enter your password and click on the “Delete Account” button again.
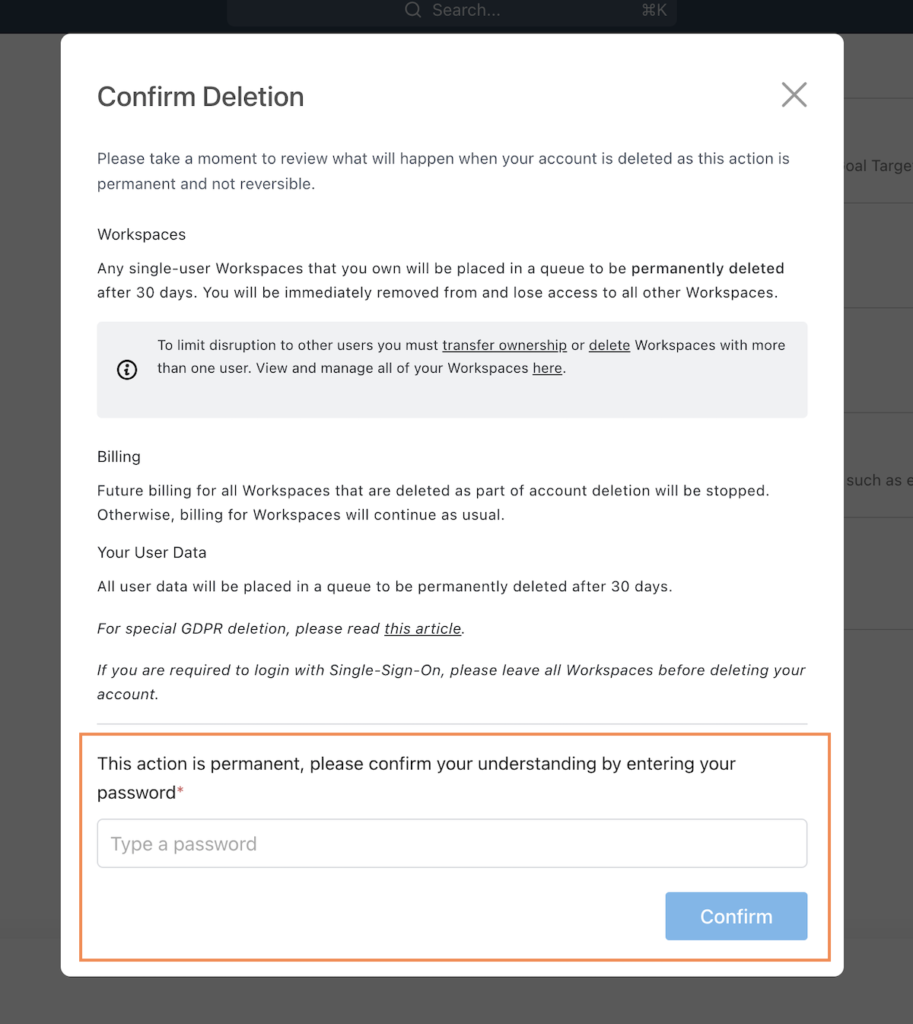
8. Wait for the deletion process to complete.
Once your account is deleted, you’ll be logged out of ClickUp, and all your data will be permanently removed from their servers.
Alternative options to consider before deleting your account
Before going through with the account deletion process, it’s worth considering a few alternative options. If you’re experiencing any issues with ClickUp, reaching out to their support team might help resolve the problem. They can provide guidance, offer solutions, or address any concerns you may have. Additionally, ClickUp is constantly evolving and improving, so it’s worth keeping an eye on their updates to see if any new features or improvements align with your needs.
If you’re switching to a different project management tool, make sure to explore its features thoroughly and import your ClickUp data if possible. This will ensure a seamless transition and minimize any disruption to your workflow.
FAQs about deleting a ClickUp account
Q: Can I reactivate my ClickUp account after deleting it?
A: No, once your ClickUp account is deleted, it cannot be reactivated. Make sure you have a backup of any important data before proceeding with the deletion.
Q: Will deleting my ClickUp account remove all my data?
A: Yes, deleting your ClickUp account will permanently remove all your data, including tasks, comments, and attachments. Make sure to backup any important information before deleting your account.
Q: Can I delete a specific workspace without deleting my entire ClickUp account?
A: Yes, you can delete individual workspaces within ClickUp without deleting your entire account. Follow the steps outlined in this guide to delete specific workspaces.
Q: What happens to my ClickUp subscription after deleting my account?
A: Deleting your ClickUp account will automatically cancel your subscription, and you won’t be charged any further. However, it’s important to cancel your subscription manually before deleting your account to avoid any unnecessary charges.
Related
ClickUp Pricing Explained, All You Need to Know
ClickUp 3.0 2024: Everything You Need to Know in 2024
How to Login to your ClickUp Account
How to Change Your Profile Photo on ClickUp
Pingback: The Clickup How To Guide - Digital Marketing CEO
Pingback: A Guide to Integrating Harvest with ClickUp - Digital Marketing CEO
Pingback: How to Use Me Mode on ClickUp - Digital Marketing CEO
Pingback: How to Change Your Profile Photo on ClickUp - Digital Marketing CEO
Comments are closed.